I’ve released another PICO-8 game. This one is a clone of one of my favorites from Windows 3.1’s Windows Entertainment Pack: Rodent’s Revenge.
I’ve released another PICO-8 game. This one is a clone of one of my favorites from Windows 3.1’s Windows Entertainment Pack: Rodent’s Revenge.

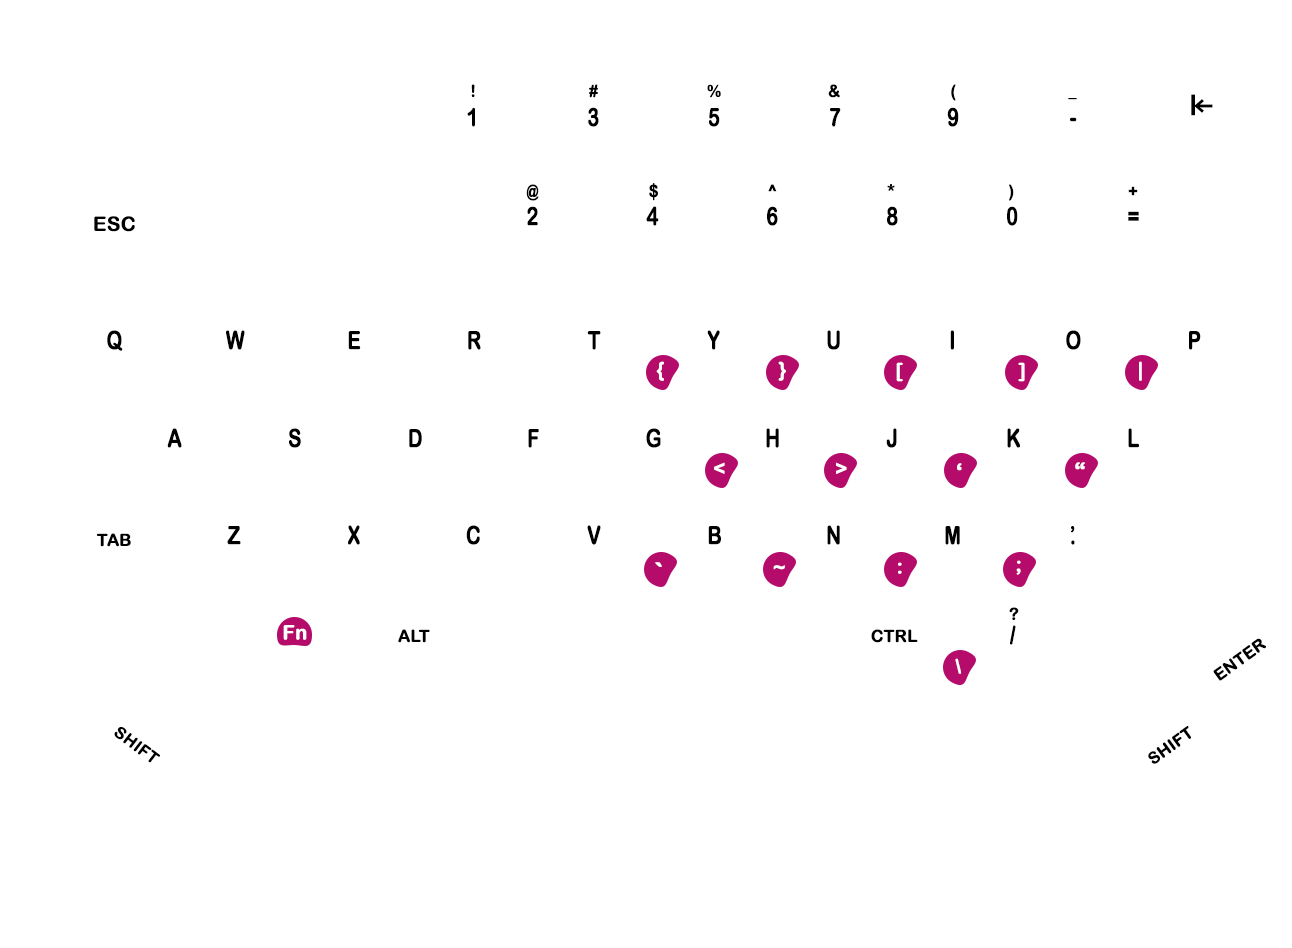
I used this face plate keyboard https://www.thingiverse.com/thing:1998427
I printed the plate with clear PLA and 36% infill. It was too much infill and it got rough around the display, still usable. I’d probably reprint with 25%.
I used the PLA version of the buttons with 25% infill. I also made a small modification to the bridge that connects the escape button to the d-pad per a suggestion on the author’s GitLab account. The bridge connects to the up arrow instead of the left arrow. Not sure that it helped much because the left arrow still doesn’t feel as clicky as the rest.
You have to be super careful pulling the buttons off the printer plate to avoid breaking the bridges between the buttons. I broke two but used the tip of a hot glue gun to melt them back together.

For the label, I scanned the face plate and placed all the letters in PhotoShop. It took some trial and error, but I ended up with a font and size that looks ok. I laser printed the label on removable vinyl then cut it out on the Cricut. It fit perfectly.
Here’s my edited keyboard button model and my keyboard label files. WordPress hates zip files so tar.gz it is.

Well this was way more involved than I had expected.
I wanted to hook up a bluetooth gamepad to my PocketChip so I could play PICO-8 games a little more ergonomically. I had a few controllers laying around, but one seemed perfect for the job: the 8BitDo Zero. It’s really small and it fits the “pocket” ethos of the PocketChip. The only downside is that I’ve never actually gotten the damn thing to work correctly on any system I’ve connected it to.

It has a few different modes for different systems. One is a keyboard emulation which just “types” letters when you push the buttons. This is the easiest mode to get working and it works on any device that will accept a bluetooth keyboard. The downside is that you have to remap all the key bindings in the programs you’re trying to control. PICO-8 doesn’t have control profiles or anything that would make this a friendly option.
It also has a gamepad mode. That sounds promising! First thing you have to do is get it connected. Luckily I had just spent a ton of time trying to get my bluetooth speaker connected so I was familiar with bluetoothctl. power on; agent on; scan on; pair; trust; connect.
Out of the gate it looked promising because the d-pad worked like the arrow keys. I was able to navigate SPLORE, but sadly the other buttons didn’t work. Looking at the PICO-8 log, I saw that there were no joysticks discovered. Well why not?
apt install jstest-gtk
Running jstest I was able to see the buttons were actually working but that was on the `/dev/input/js0′ device. Also, the d-pad wasn’t actually getting interpreted as gamepad buttons – instead normal keyboard scan code were being sent. Sigh. After a bunch of reading, it turns out that SDL2 no longer supports the joystick devices, but instead looks at event devices.
There’s a known problem with SDL on Linux where the udev devices aren’t readable by normal users. The fix is to add add your account to the input group. That wasn’t the case on the PocketChip. The chip user was already in the input group.
I ran across some forum posts suggesting that the controller mapping may need to be updated. The “normal” way to do this is to use a tool that is only released in binary form and, sadly, there wasn’t an ARM build for the PocketChip. One user suggested building the controllermap tool from source on the device. Sounded promising, but it also sounded like a lot of typing for that tiny keyboard.
apt install openssh-server
In order to make it easier to futz around with building on the PocketChip I installed ssh server so I could at least work on a real laptop instead of the tiny screen with the tiny keyboard. Then I followed the instructions on the forum post … and it didn’t build. It wouldn’t build because configure wanted some sdl_config tool in the path… and I didn’t have that. Ok…
apt install libsdl-dev
Don’t do this. You don’t need to. I didn’t need to either, but I didn’t know that yet. That solved my problem and I was able to configure the tests and build the controllermap tool. Then I ran it… “SDL was built without joystick support.” Wat.
Well.. I already had the SDL2 sources downloaded so might as well build the whole thing. It took about 20 minutes and when it was done, I had a shiny new SDL2 from source and was able to build controllermap. This time when I ran it I got a useful error: “ERROR: Couldn’t initialize SDL: No available video device.” I guess that’s progress. Set up X forwarding… run again… “There are 0 joysticks available.” Progress?
More searching. I’m in the “3 results” part of Google now but I found a post which lead me to this udev rules file on GitHub. After a little reading about udev I gave it a shot and added this rule.
# 8Bitdo ZERO
SUBSYSTEM=="input", ATTRS{name}=="8Bitdo Zero GamePad", MODE="0666", ENV{ID_INPUT_JOYSTICK}="1"
That actually worked…ish. It worked well enough that the controllermap program at least could find gamepad. Unfortunately I wasn’t able to complete the mapping wizard because the d-pad still wasn’t working. Looking at that rules file, the author had linked to the SDL2 readme and labelled it “Useful reading“. In the last section it introduced a few new commands to try: evtest and udevadm.
Running evtest shows you a list of the event devices along with their friendly names. I picked the 8BitDo and it started logging the buttons that were pushed. Everything made sense except the d-pad which was still emitting keyboard scan codes. So I checked out the other command. sudo udevadm info --query=all --name=input/eventXX, using the event device number from evtest I got this.
P: /devices/platform/soc@01c00000/1c28c00.serial/tty/ttyS1/hci0/hci0:5/0005:05
A0:3232.0002/input/input4/event3
N: input/event3
E: BACKSPACE=guess
E: DEVNAME=/dev/input/event3
E: DEVPATH=/devices/platform/soc@01c00000/1c28c00.serial/tty/ttyS1/hci0/hci0:5
/0005:05A0:3232.0002/input/input4/event3
E: ID_INPUT=1
E: ID_INPUT_JOYSTICK=1
E: ID_INPUT_KEY=1
E: ID_INPUT_KEYBOARD=1
E: MAJOR=13
E: MINOR=67
E: SUBSYSTEM=input
E: USEC_INITIALIZED=2417702041
E: XKBLAYOUT=us
E: XKBMODEL=pc105
Hmm… INPUT_KEYBOARD doesn’t sound right. At this point I was getting frustrated so I hooked up a SteelSeries Nimbus and tried with that… after burning 30 minutes on that hot mess (something was borked with the d-pad), I tried with the Nintendo Pro controller and worked just fine. I was able to run controllermap and generate the mapping, paste it into PICO-8’s sdl_controllers.txt file and for the first time actually see that this is possible.
Looking at the the udevadm output for the Nintendo Pro controller I didn’t see anything about a ID_INPUT_KEYBOARD so I wondered if I could remove that from the 8BitDo with the udev rule. Much reading later…
# 8Bitdo ZERO
SUBSYSTEM=="input", ATTRS{name}=="8Bitdo Zero GamePad", MODE="0666", ENV{ID_INPUT_JOYSTICK}="1", ENV{ID_INPUT_KEY}="0", ENV{ID_INPUT_KEYBOARD}="0"
I was hoping that if I turned off INPUT_KEYBOARD it would keep the d-pad from sending keyboard events. I wrote the rule to /etc/udev/rules.d/99-8bitdo.rules and reloaded the rules udevadm control --reload-rules. Then the rules needed to be triggered again so I disconnected and reconnected the gamepad. This time when I ran evtest I got sane looking events from the d-pad! Next step was to build the controllermap. Moment of truth! controllermap 0 > ~/controls.txt Hey it worked! I pasted the output controller map into PICO-8’s mapping list and booted up SPLORE and it worked! All the buttons “just worked.”
So I’m really happy. This is the first time my little 8BitDo Zero has ever actually worked correctly in all the years I’ve had it. Now I can play my PICO-8 games with a nicer controller and what a difference it makes for some of the platformers that decided that “up arrow” should be jump (mumble mumble)…
If you’re one of the very few people in the world who is trying to hook up a 8BitDo to a PocketChip (or Pi) I hope this helps. Also, hopefully I can save you a step and you can just use my PocketChip build of controllermap from the SDL2 tests.
/etc/udev/rules.d/99-8bitdo.rulesbluetoothctlcontrollermap 0 > map.txt~/.lexaloffle/pico-8/sdl_controllers.txtThis ended up being more of a pain than I expected so I figured I’d write it down for the next person who tries.
sudo apt install pulseaudio pulseaudio-utils pulseaudio-module-bluetoothbluetoothctl and run the following in the prompt:power onagent onscan onbluetoothctl prompt run the following:pair <hardware address>trust <hardware address>connect <hardware address>connected: yes. After that your PocketChip should remember the speaker. You may need to run connect again, to reconnect if you turn the speaker off and on, but you won’t need to re-pair.paired-devicesquitalsamixer to adjust the volume.Update
I’ve found that if pulse audio isn’t running before attempting to connect to the speaker, the bluetooth connection will fail. I wrote a script that helps make reconnecting easier.
#!/bin/bash
pulseaudio -k # kill existing service
pulseaudio --start
bluetoothctl -- connect <your speaker hardware address>
sleep 8
pacmd set-default-sink 1 # where 1 is the card id
amixer set Master 20%
Good luck and I hope this helped.
I’ve released another PICO-8 game. It’s an homage to Frozen Bubble and Puzzle Bobble.
Try it out here https://www.lexaloffle.com/bbs/?tid=45177
I’ve finished my first little PICO-8 game!
Check it out! https://www.lexaloffle.com/bbs/?tid=44959
PICO-8 has this nice helper function called foreach(table, func) which will call the function for each item. I like to use this in my _draw function to dispatch drawing to game objects. The trouble is that most of the time I want to call a method (table-bound function) instead of a function. Normally this required a helper function per-method to invoke.
Consider the following PICO-8 code (it’s just Lua with some sugar).
-- returns a table with table-bound method 'draw'
function dot(x, y)
 return {x=x, y=y,
  draw=function(self,col)
   local c=col or 7
  	pset(self.x,self.y,c)
  end
 }
end

-- returns a function with captured upvalues
function dot2(x, y)
 return function(col)
  local c=col or 7
  pset(x,y,c)
 end
end

function _init()
 drawable={}
 add(drawable, dot(64, 64))
 add(drawable, dot2(64, 68))
end
In this example, I’m showing two different ways to make “drawable” instances. dot returns its instance as a table with a method named draw. dot2 returns a function which draws itself when invoked. I’ll start with the dot2 case.
function invoke(o)
 o()
end

function _draw()
 cls()
 foreach(drawable, invoke)
end
The nice thing about the approach of making drawable a function closure is that you can make a generic invoke helper function which just calls instance. This means you only need a single helper function. The downside is that you can only return one callable behavior this way which isn’t ideal for more complex objects.
function call_draw(o)
 o:draw()
end

function _draw()
 cls()
 foreach(drawable, call_draw)
end
This approach is more flexible and allows for more methods to be defined, but now you need a call_foo helper for each different method to call. Another problem with both approaches is you can’t pass in arguments to the method calls.
It turns out that Lua gives us a ton of flexibility to build our generic dispatch. Let’s start with the problem of dispatching by name.
-- Call Method
function callm(method)
 return function(o)
  o[method](o)
 end
end

function _draw()
 cls()
 foreach(drawable, callm("draw"))
end
callm is a pretty simple helper. The core of it just does a table lookup by name and invokes the result. callm returns a function because foreach expects a function that takes the object being iterated. There are a few problems with this approach. First this crashes if there isn’t a draw method on the instance. Second, the dot.draw method takes an argument and there’s no way to pass one in.
-- Call Method
function callm(method, ...)
 local params={...}
 return function(o)
  if type(o)=="table" then
   local m=o[method]
   if type(m)=="function" then
    m(o,unpack(params))
   end
  end
 end
end

function _draw()
 cls()
 foreach(drawable, callm("draw", 10))
end
This version adds support for varargs that get forwarded to the method when the returned function is called. This allows parameters to be passed to the method. This also adds some type checking to ensure the instance passed in is a table and has a function named method. You can see the foreach call site looks pretty good.
Finally, if you want to continue to use callable objects instead of tables, we can take this same concept and make it work with those too.
-- Call function 'object'
function call(...)
 local params={...}
 return function(o)
  if type(o)=="function" then
   o(unpack(params))
  end
 end
end

function _draw()
 cls()
 foreach(drawable, call(10))
end
Final thoughts
This adds overhead to the calls, and it’s almost certainly more efficient to use for x in all(XS). That said, it’s a neat little piece of code and I think it’s pretty cool that it can be accomplished with Lua.
function _init()
 game_items={}
 -- add items
end

function _update()
 -- call 'update' on each instance that implements it
 foreach(game_items, callm('update')
end

function _draw()
 -- call 'draw' on each instance that implements it
 foreach(game_items, callm('draw')
end
Let me introduce the octuple jump!
After entering the PICO-8 rabbit hole, I found out about the coolest little computer… 5 years too late.
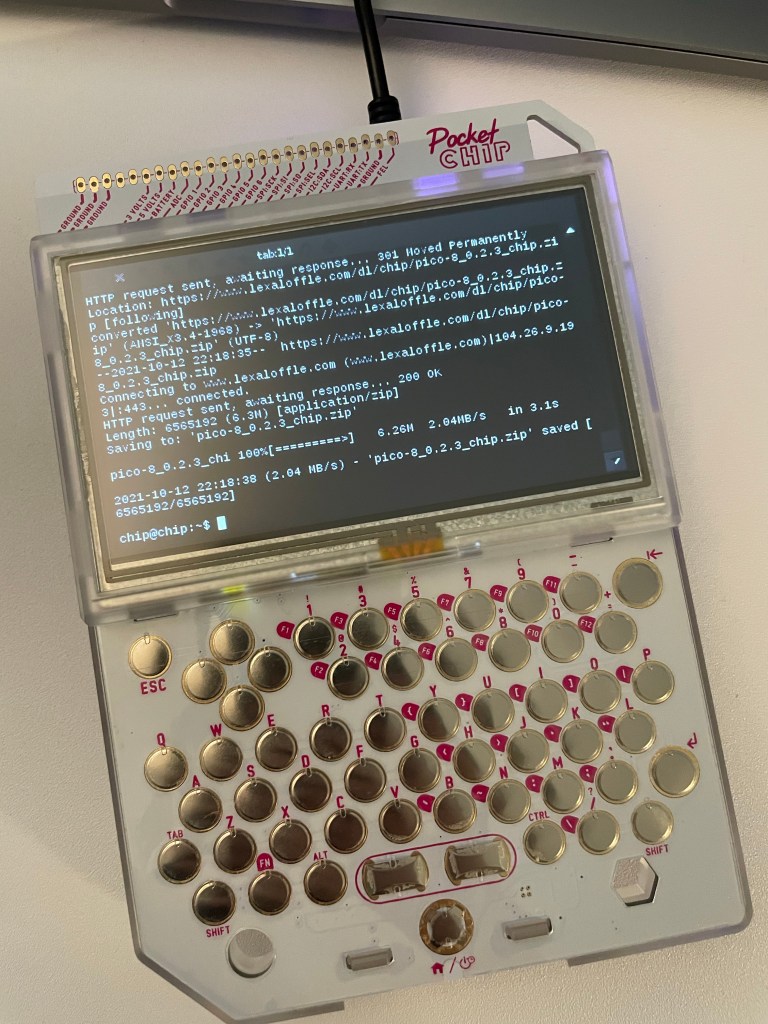
I picked one up from this site. When it got here, I charged it up and turned it on. Pretty cool little computer. You can jump right into a shell and it’s Linux. It didn’t take long until I had PICO-8 updated and I was working on my little toy game.
Unfortunately the parent company is defunct and so this little gem is stuck in the past. That’s probably ok… but it would be pretty cool to have access to a full distro, especially because it’s just so hackable. It takes me back to the early 2000s when I picked up my Sharp Zaurus 5500. There’s something especially nerdy about a tiny terminal you can bring with you.
I’m sure I’ll have more to say as I get to know it, but for now I’m using this post to bookmark a few resources.
I’ve been playing around with GLSL Shaders and was trying out a few P5.js examples on my Mac. I couldn’t figure out why my results weren’t looking like the examples.
The following is the “Hello, world” of shaders. It simply renders a gradient from black to red smoothly across the canvas.
let header =
  'precision highp float;';

// the vertex shader is called for each vertex
let vs =
  header +
  'attribute vec3 aPosition;' +
  'void main() {' +
  '  vec4 positionVec4 = vec4(aPosition, 1.0);' +
  '  positionVec4.xy = positionVec4.xy * 2.0 - 1.0;' + // Correct for GL offset bug.
  '  gl_Position = positionVec4;' +
  '}';

// the fragment shader is called for each pixel
let fs =
  header +
  'uniform vec2 u_resolution;' +
  'void main() {' +
  '  vec2 st = gl_FragCoord.xy/u_resolution.xy;' +
  '  gl_FragColor = vec4(st.x,st.y,0.0,1.0);' +
  '}';

let myShade;
function setup() {
  createCanvas(100, 100, WEBGL); // (0,0) is center
  //pixelDensity(1);  // <-- Uncomment to fix scaling.

  // create and initialize the shader
  myShade = createShader(vs, fs);
  shader(myShade);
  fill(64);
  stroke(128);
}

function draw() {
  background(192);
  myShade.setUniform("u_resolution", [width, height]);
  rect(-40, -40, 80, 80);
}
Unfortunately when I run this example on my Mac the gradient stops halfway across the canvas.

The problem is that by default there’s pixel scaling because of the Retina display which causes the pixel math to be incorrect. The solution is to specify the pixelDensity in the setup function. If the pixel density is set to 1, the shader works as expected.

pixelDensity(1) in the script setup to fix the shader scaling problem.